Getting started
Last updated: September 18, 2026
Follow these steps to create an account, use the free trial, install the client, and connect. Your website username and password are also the Cisco Secure Client credentials.
Three things you need to connect
Contents
- Create an account
- Sign in
- Dashboard
- Service and connection details
- Download and connect
- Card keys and crypto payment
- Need help
1. Create an account
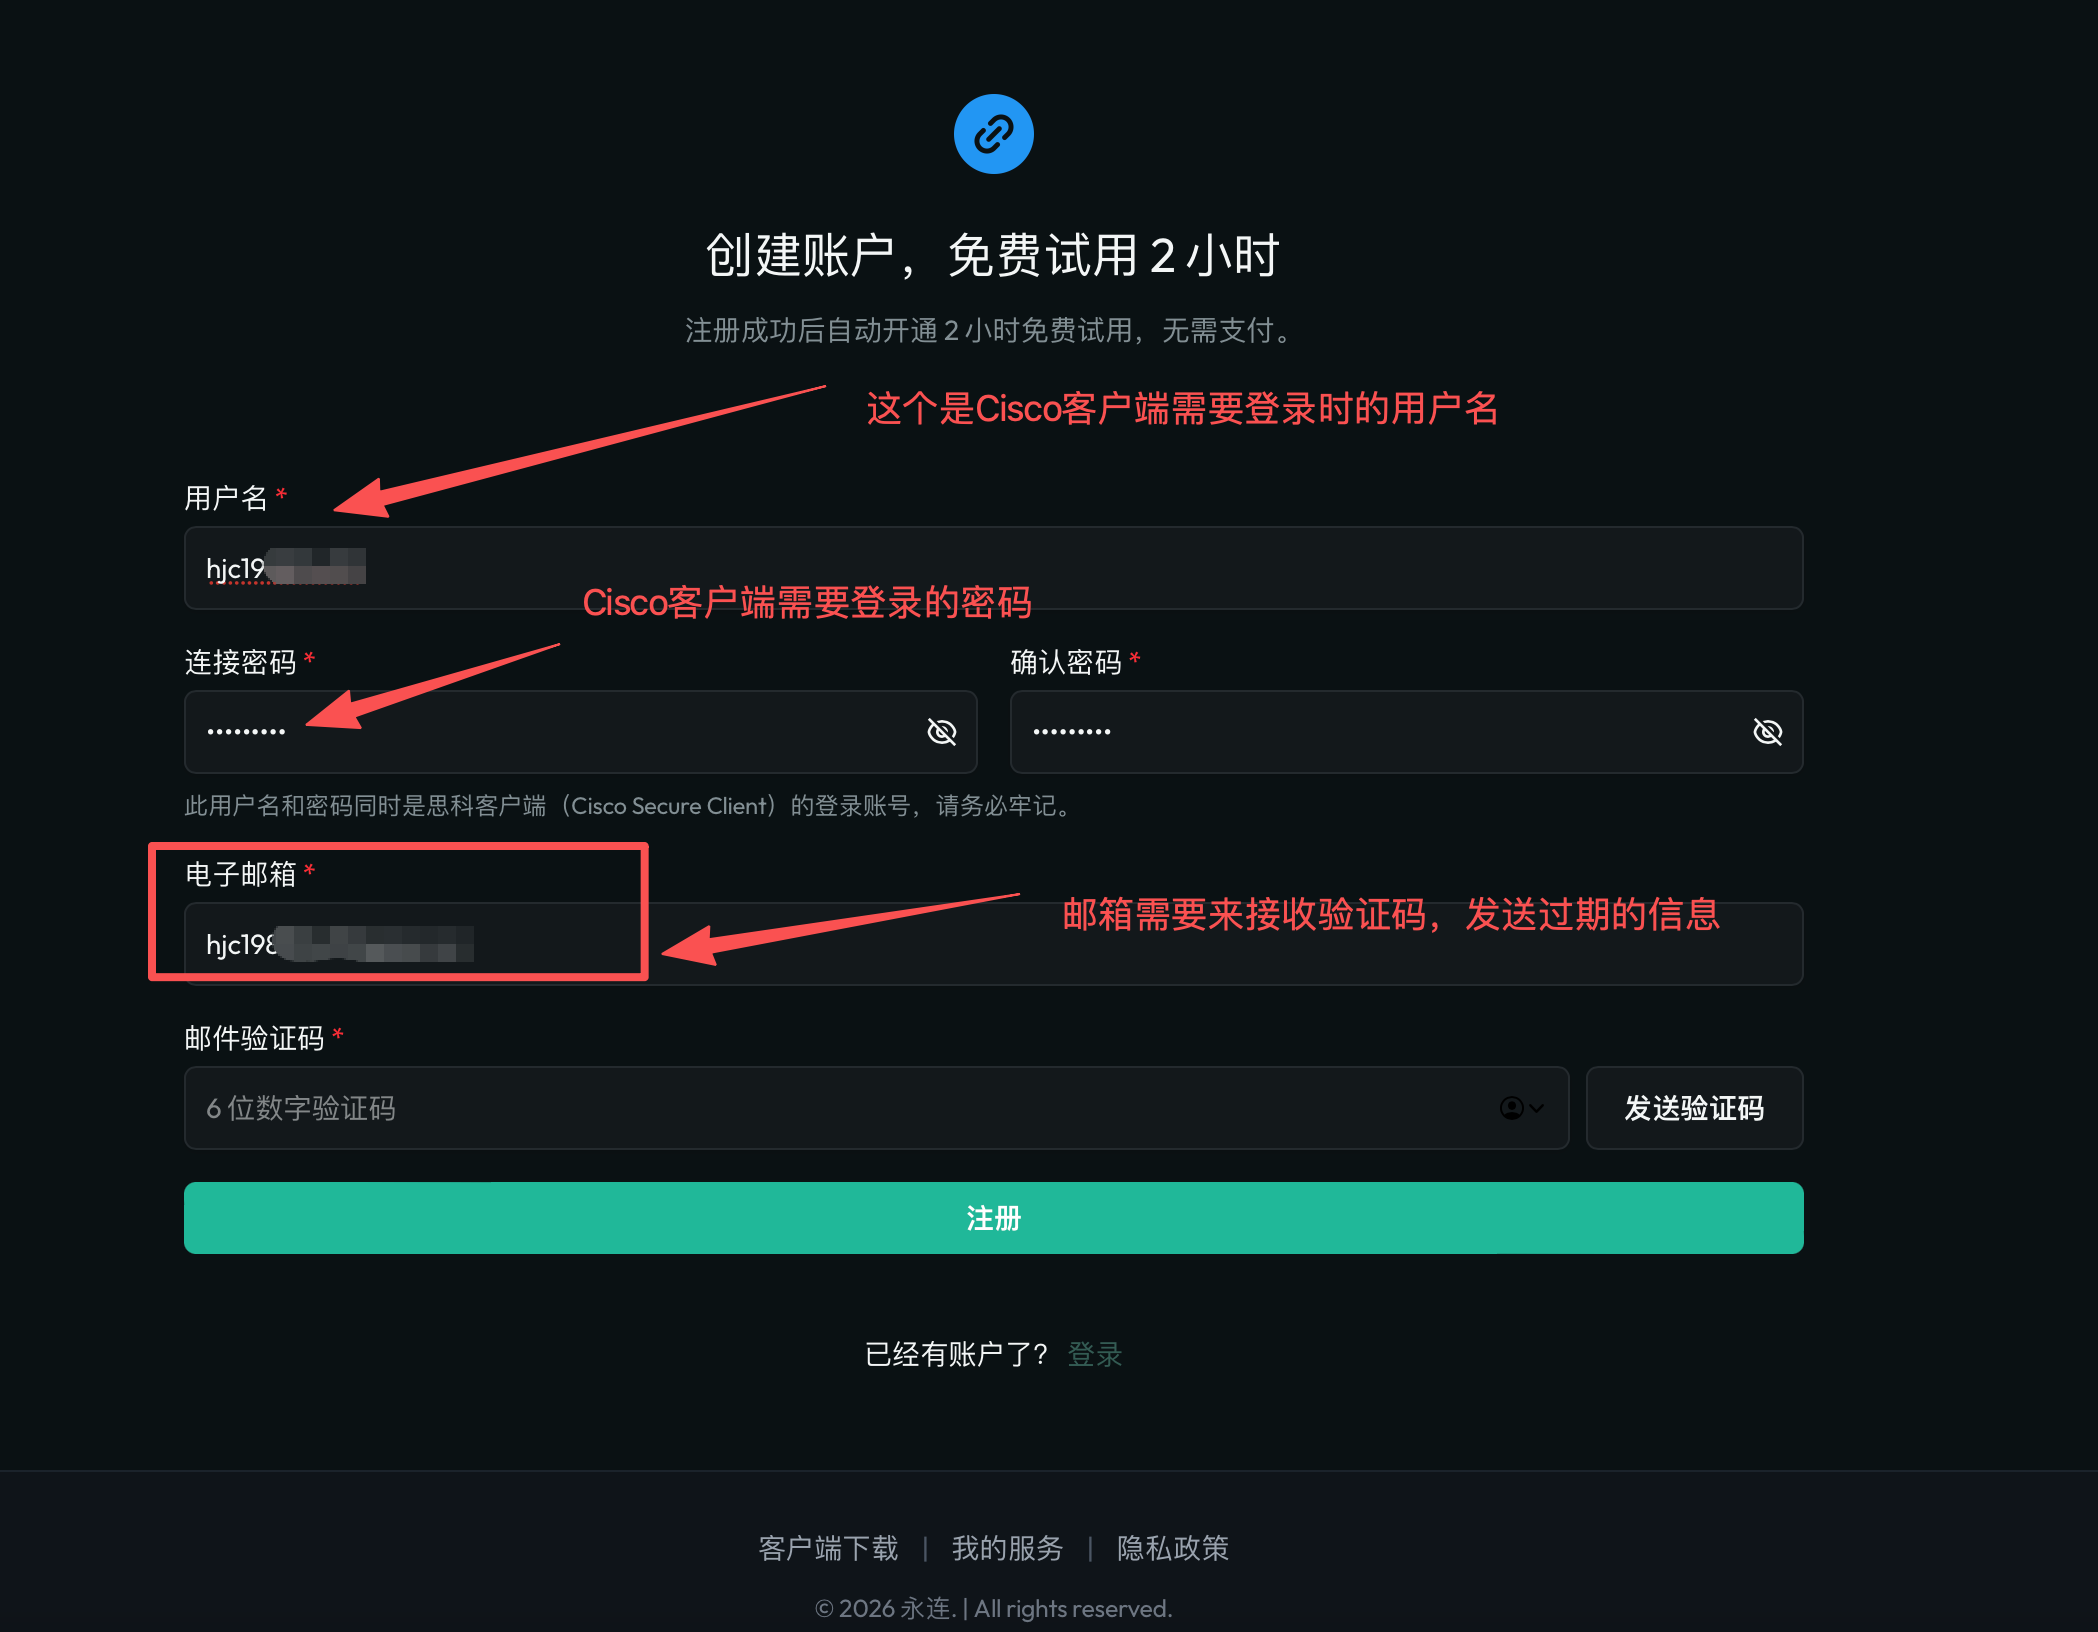
Open the registration page and enter a username, connection password, email, and the email verification code. The username must be at least 6 lowercase letters or digits. After you sign up, a free trial of about 2 hours is created automatically—no payment required.
- The username is also your Cisco client login. Keep it somewhere safe.
- The connection password is also your website password. We do not issue a separate VPN password.
- The verification code is sent to the email you entered. You can request a new one if it expires.
2. Sign in
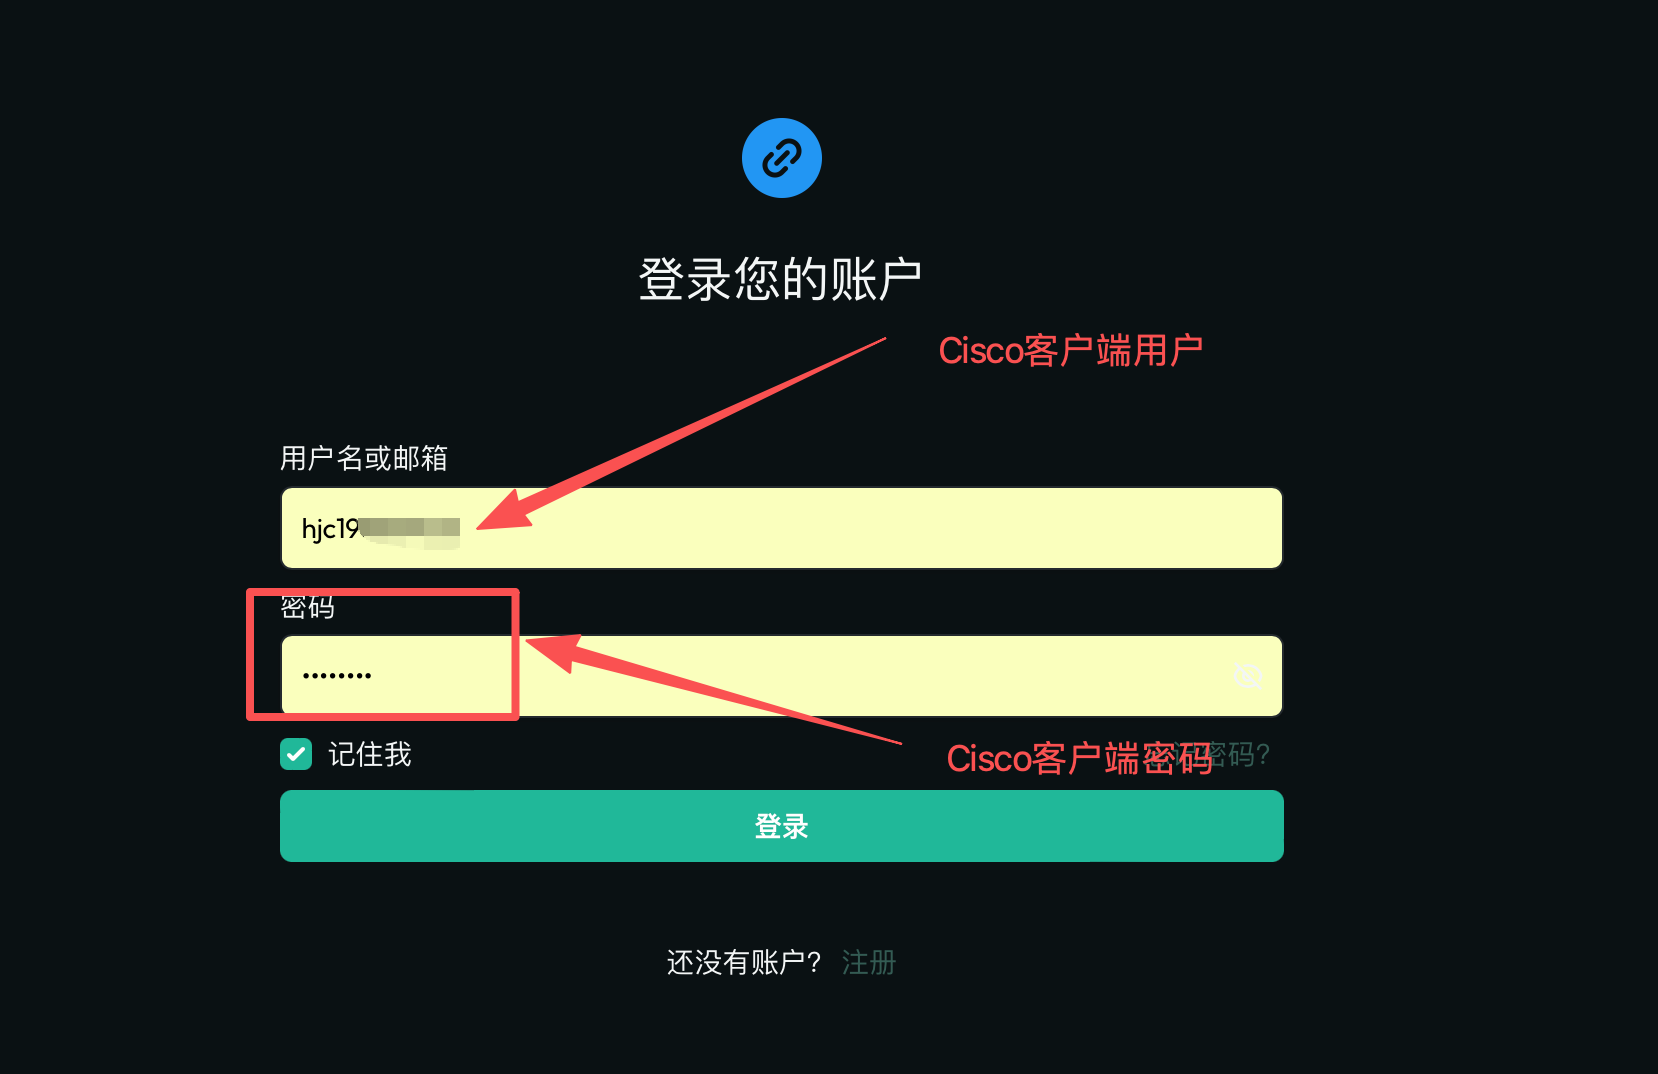
After registration, sign in with the same username (or email) and password. Cisco Secure Client uses this same pair of credentials.
3. Dashboard
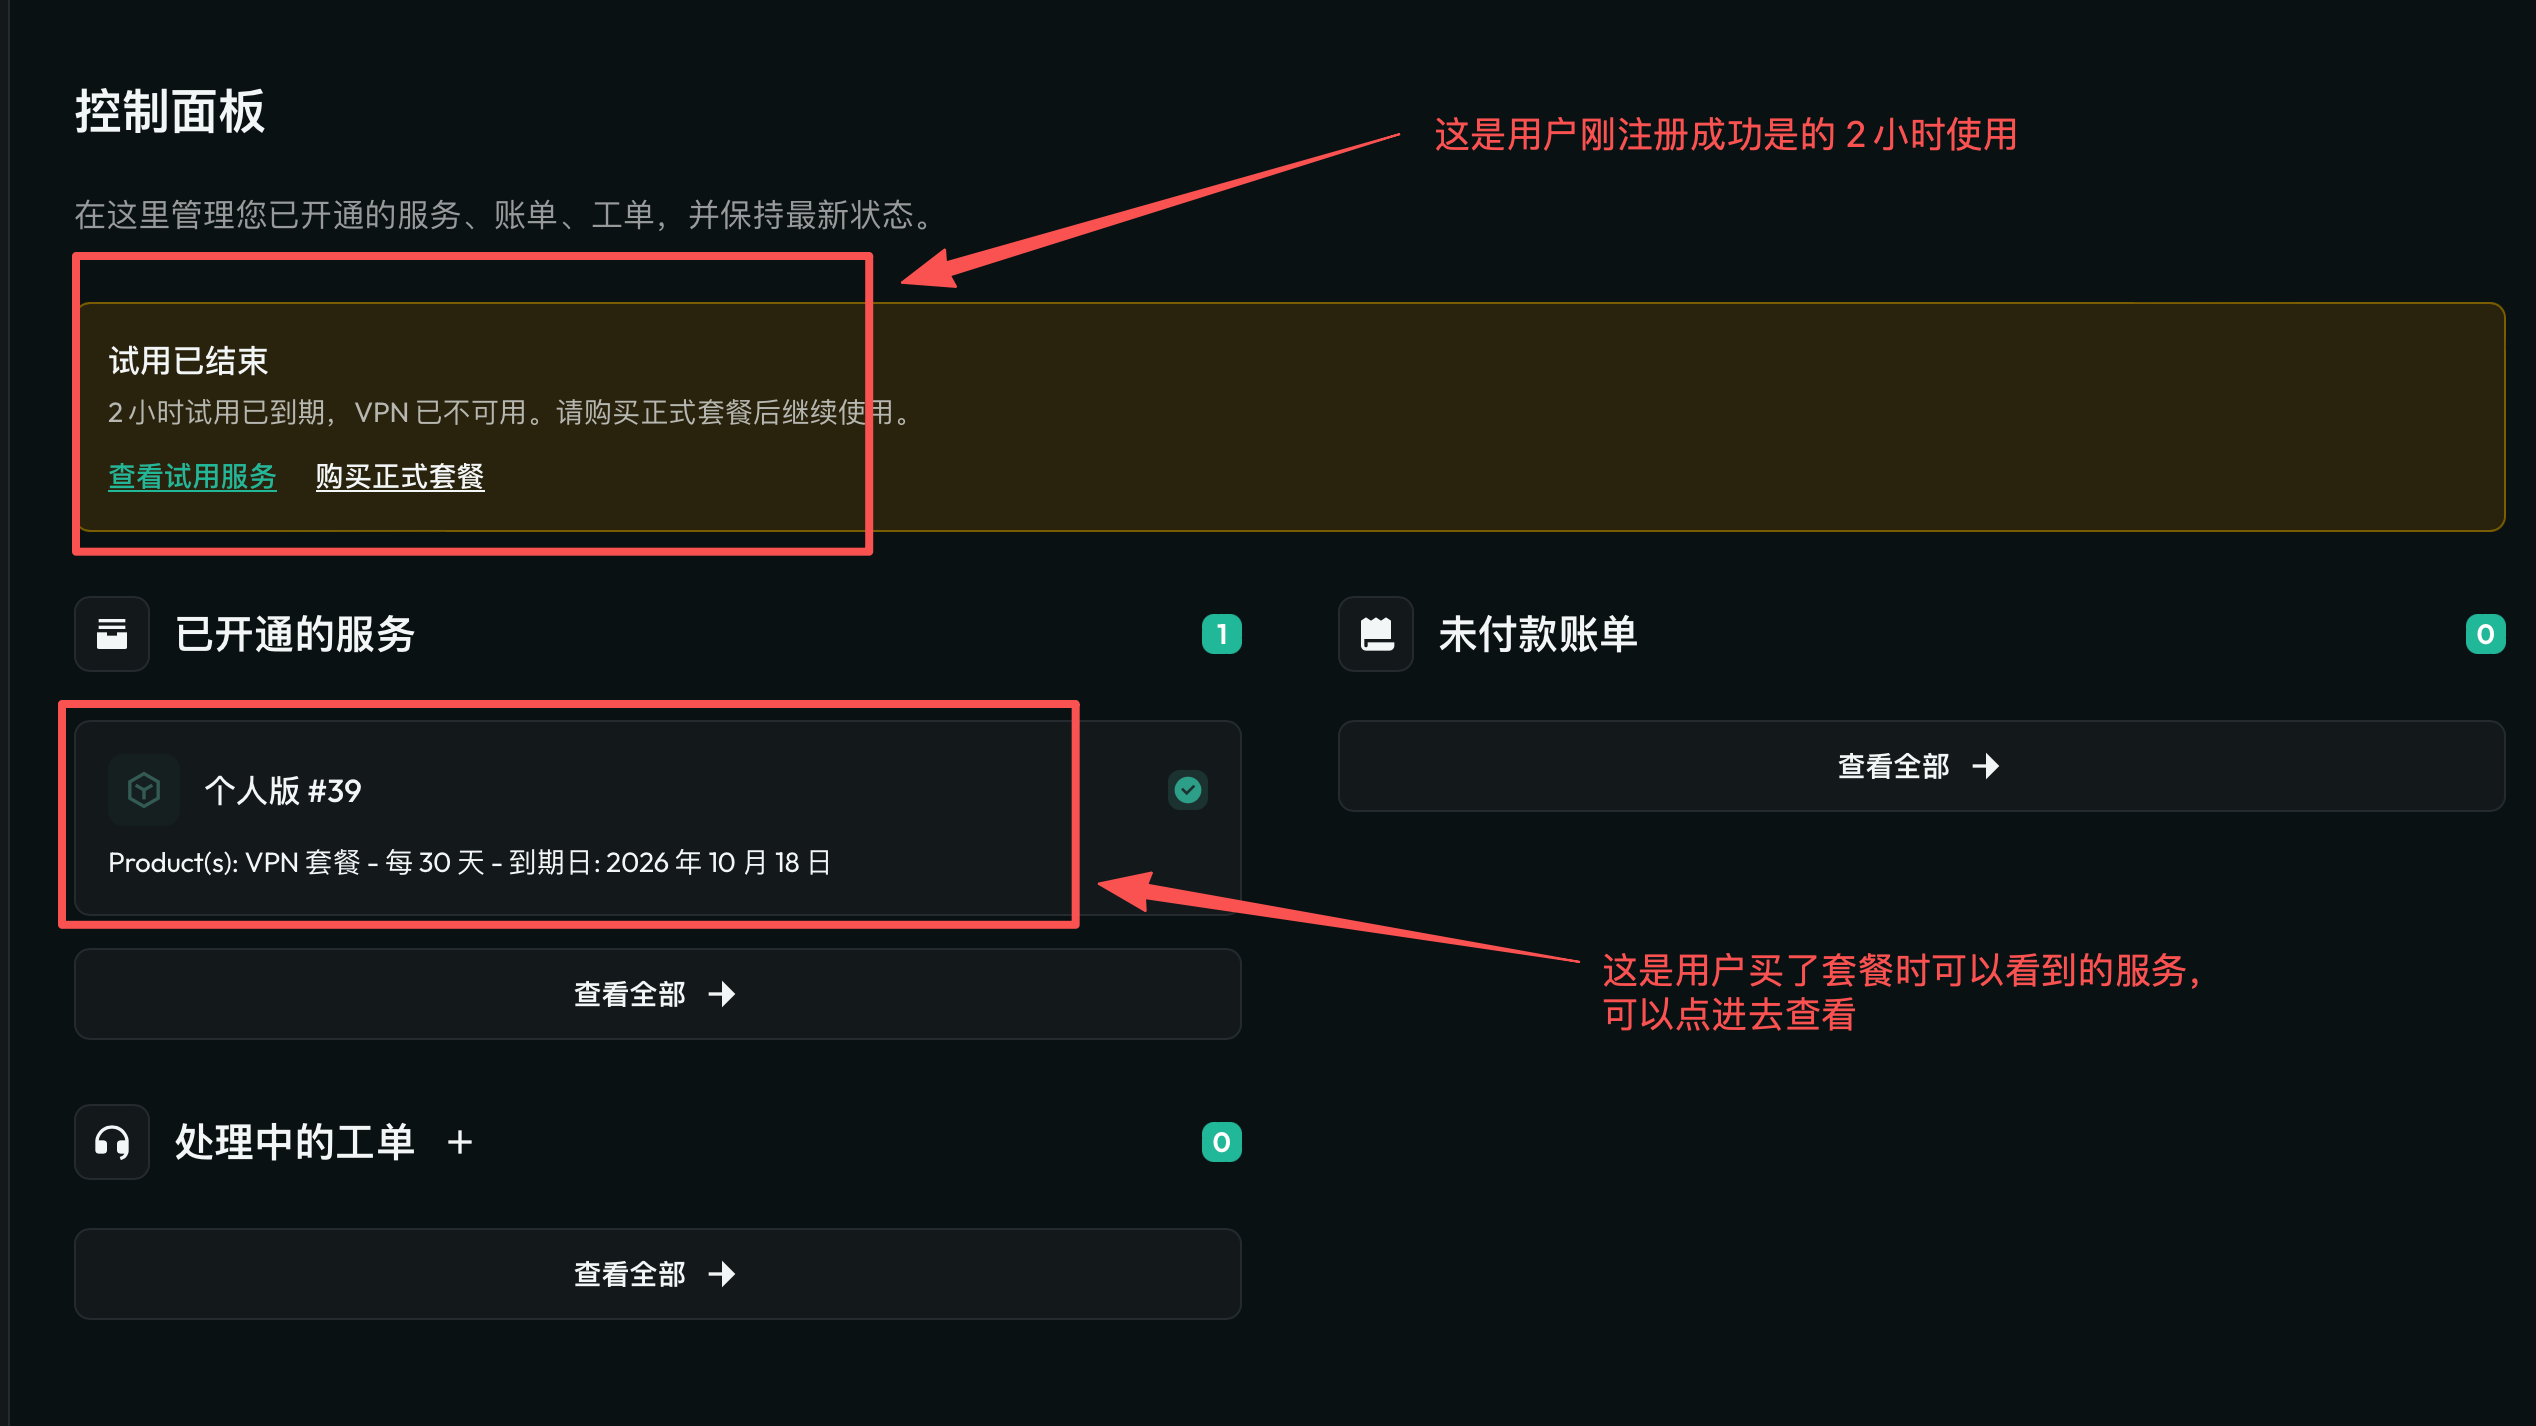
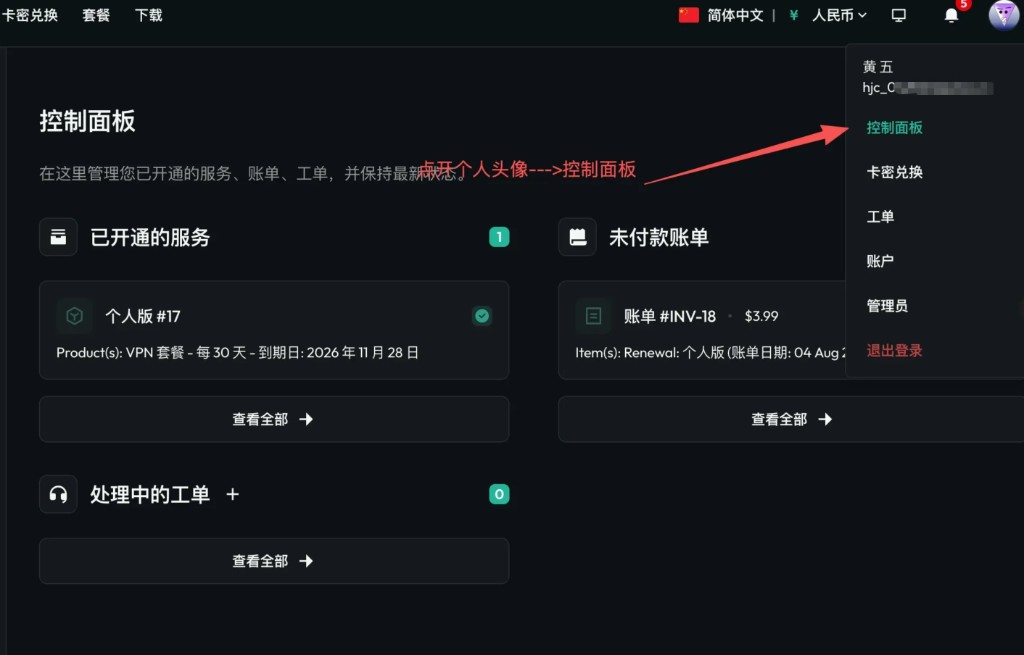
Successful registration or sign-in takes you to the dashboard. You can also open it from the avatar menu in the top-right, or by visiting the dashboard page. It shows your services, unpaid invoices, and tickets.
- You land here automatically after registration or sign-in.
- When signed in, open the avatar menu and choose Dashboard.
4. Service and connection details
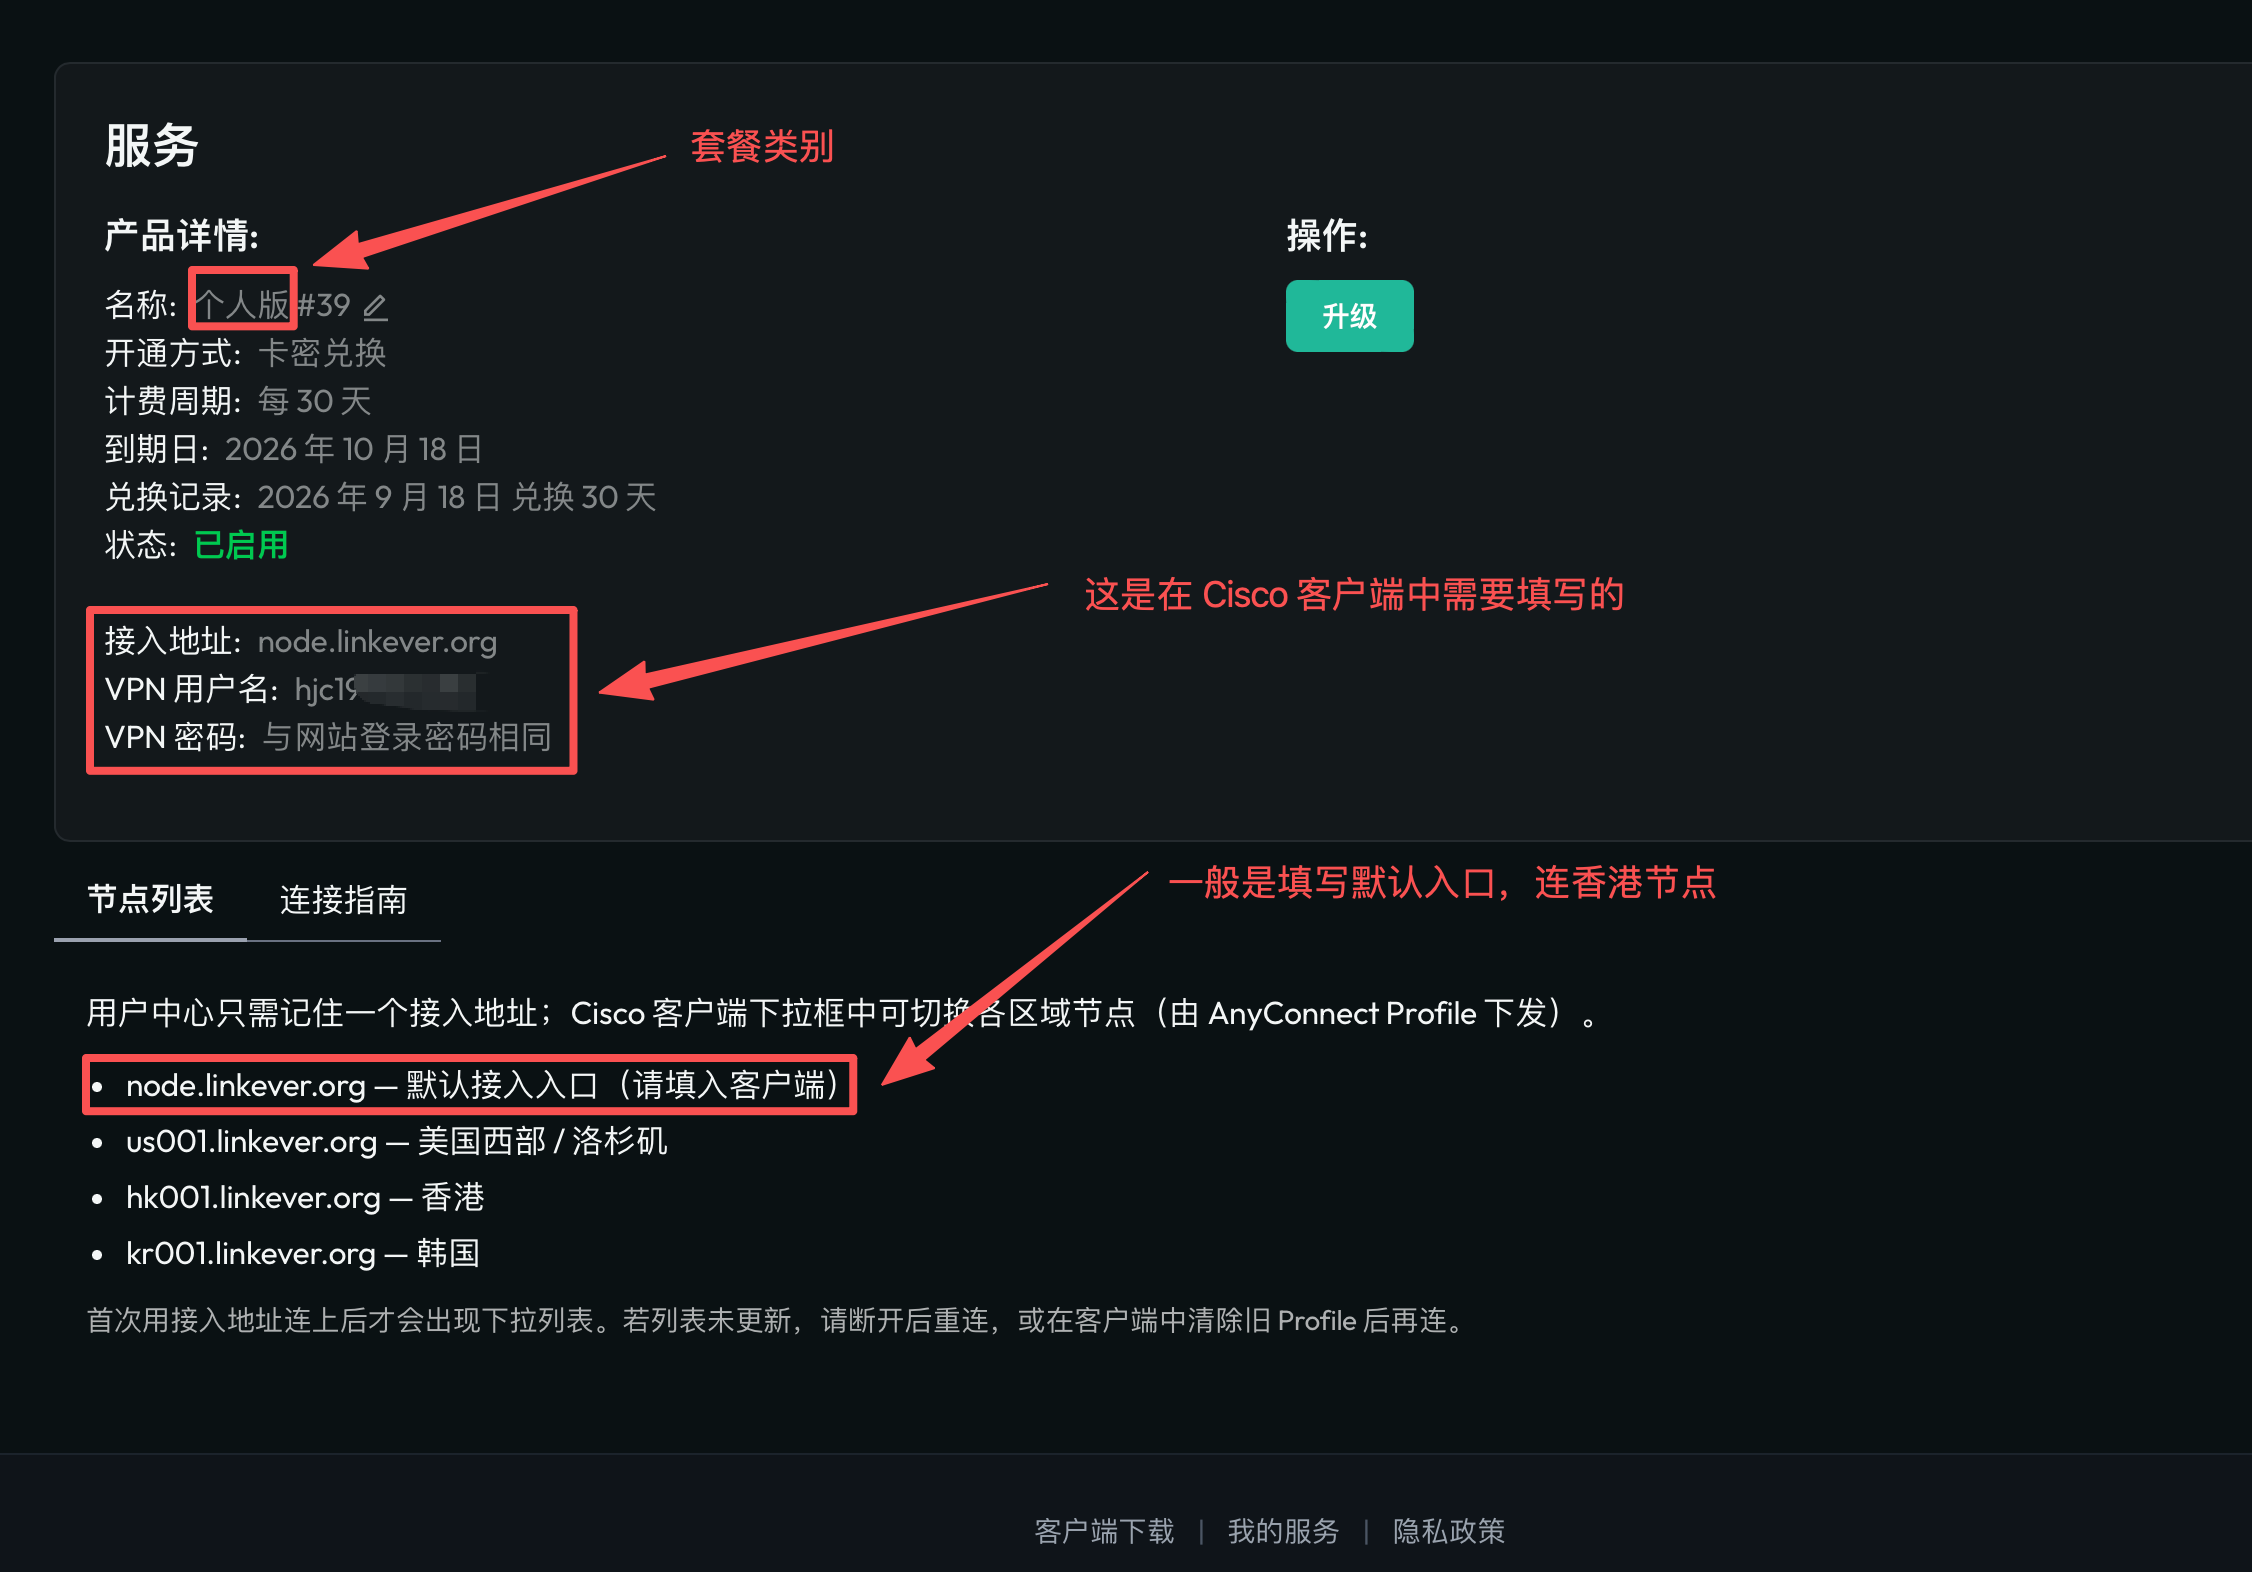
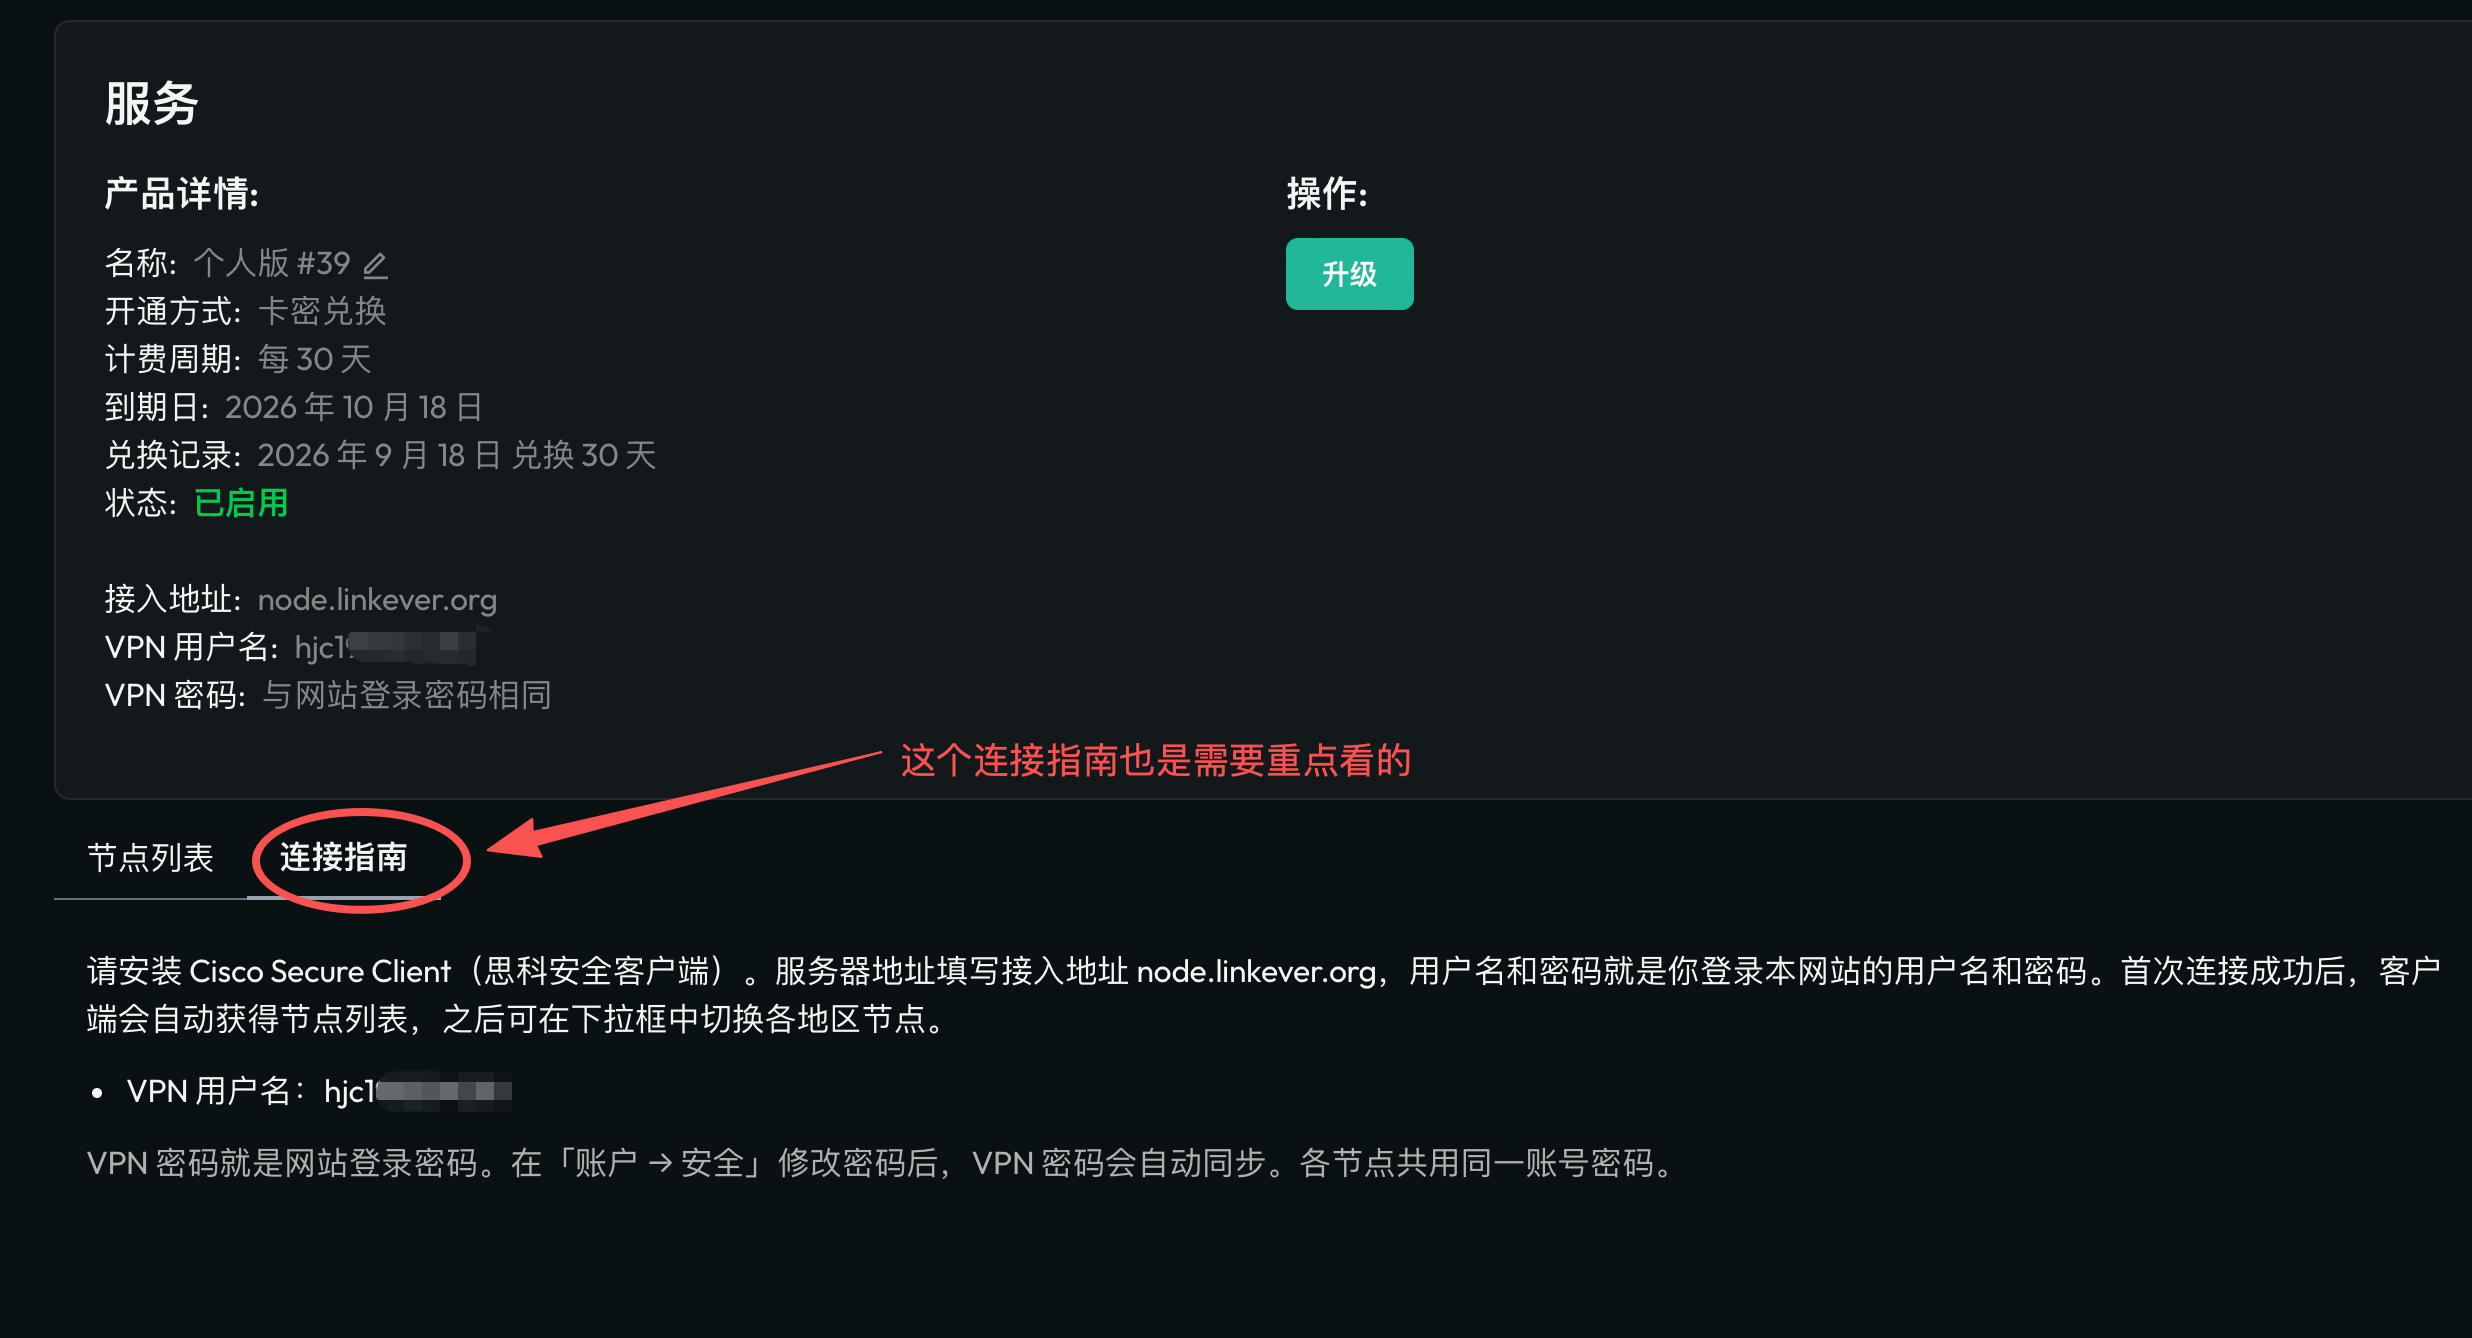
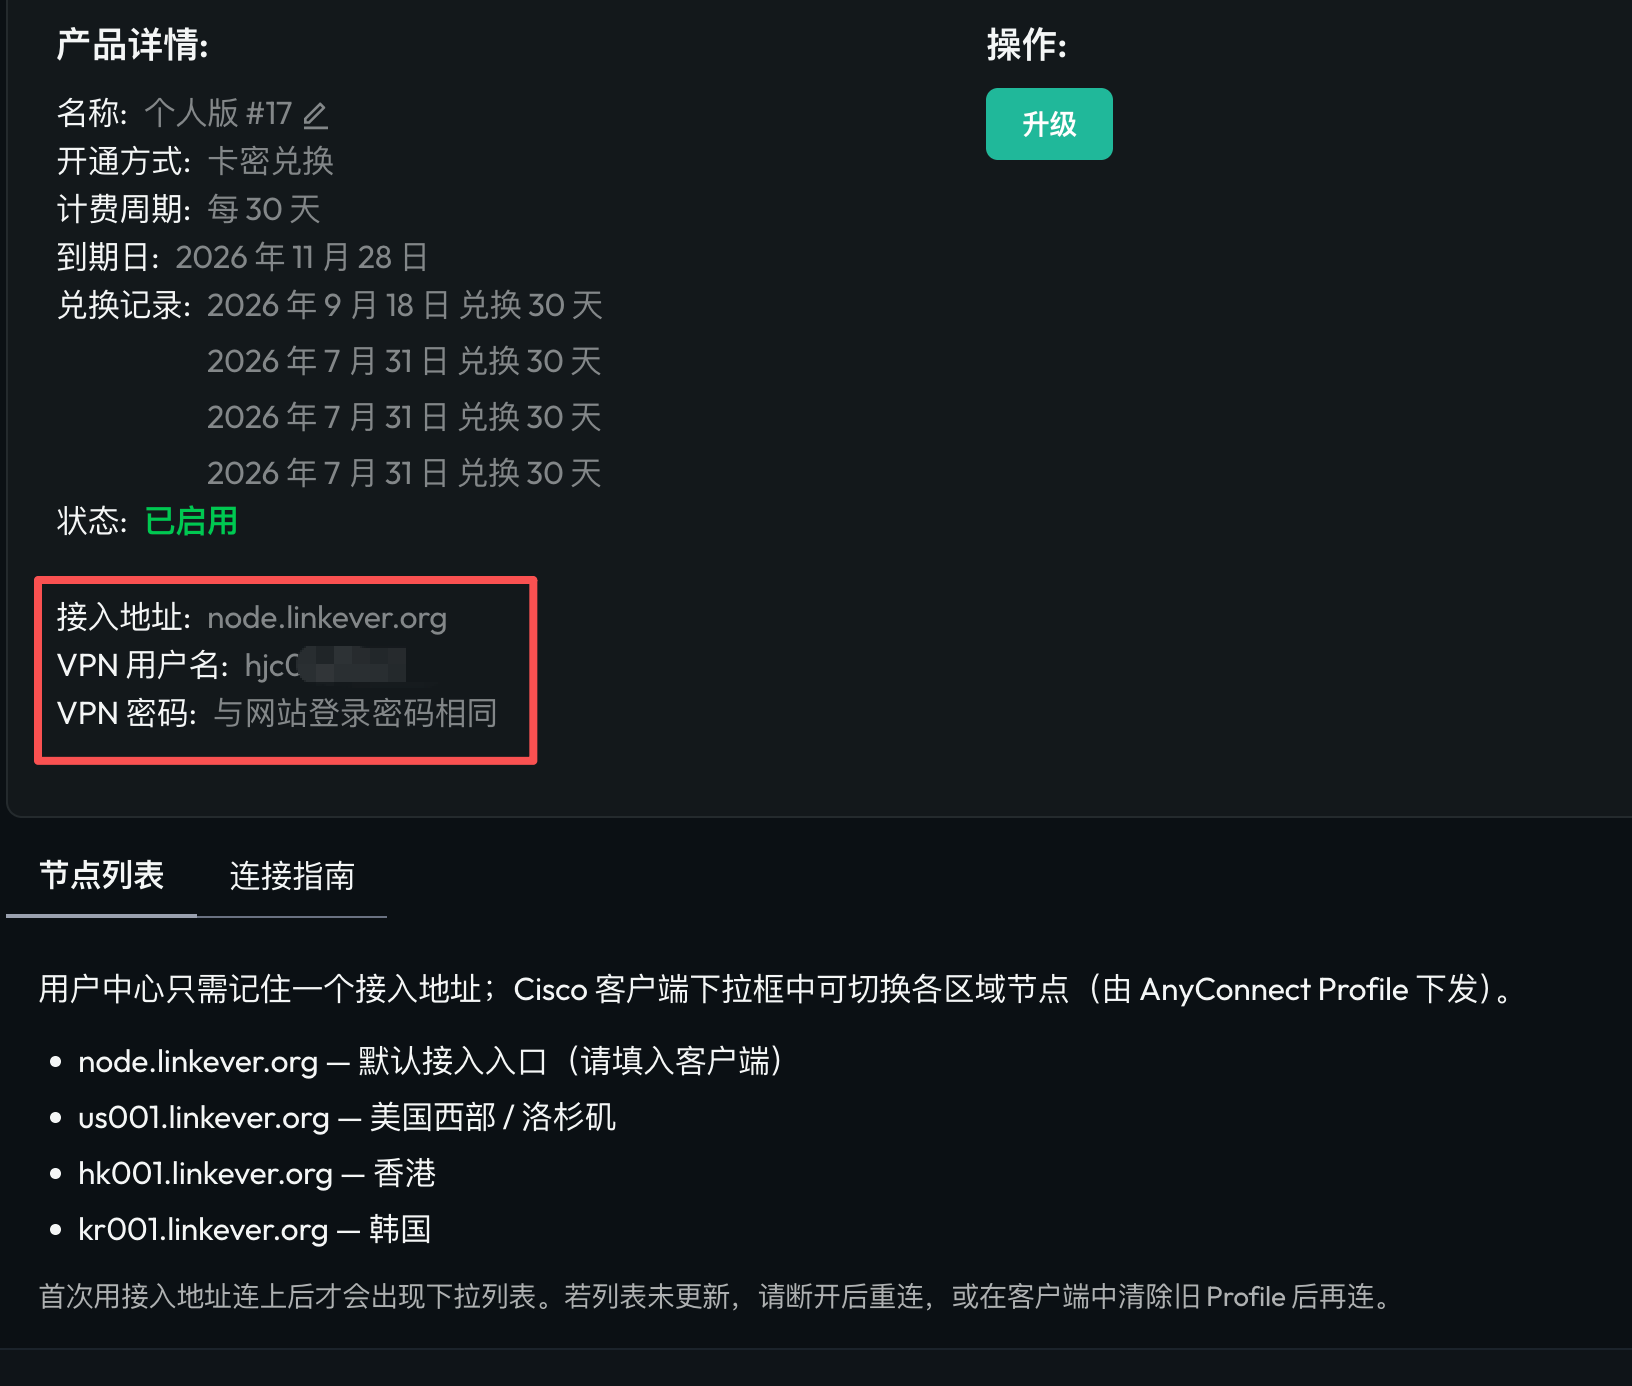
Services lists your trial and any paid plans. Open a service to see the access address, VPN username, and the setup guide. After the trial expires, you need a paid plan to keep connecting.
- Connection details: access address and username. The password is the same as your website password.
- Setup guide: install Cisco Secure Client, connect once with the access address, then switch regions from the client dropdown.
- Invoices and tickets are on the dashboard; they are not mixed into the service page.
5. Download and connect
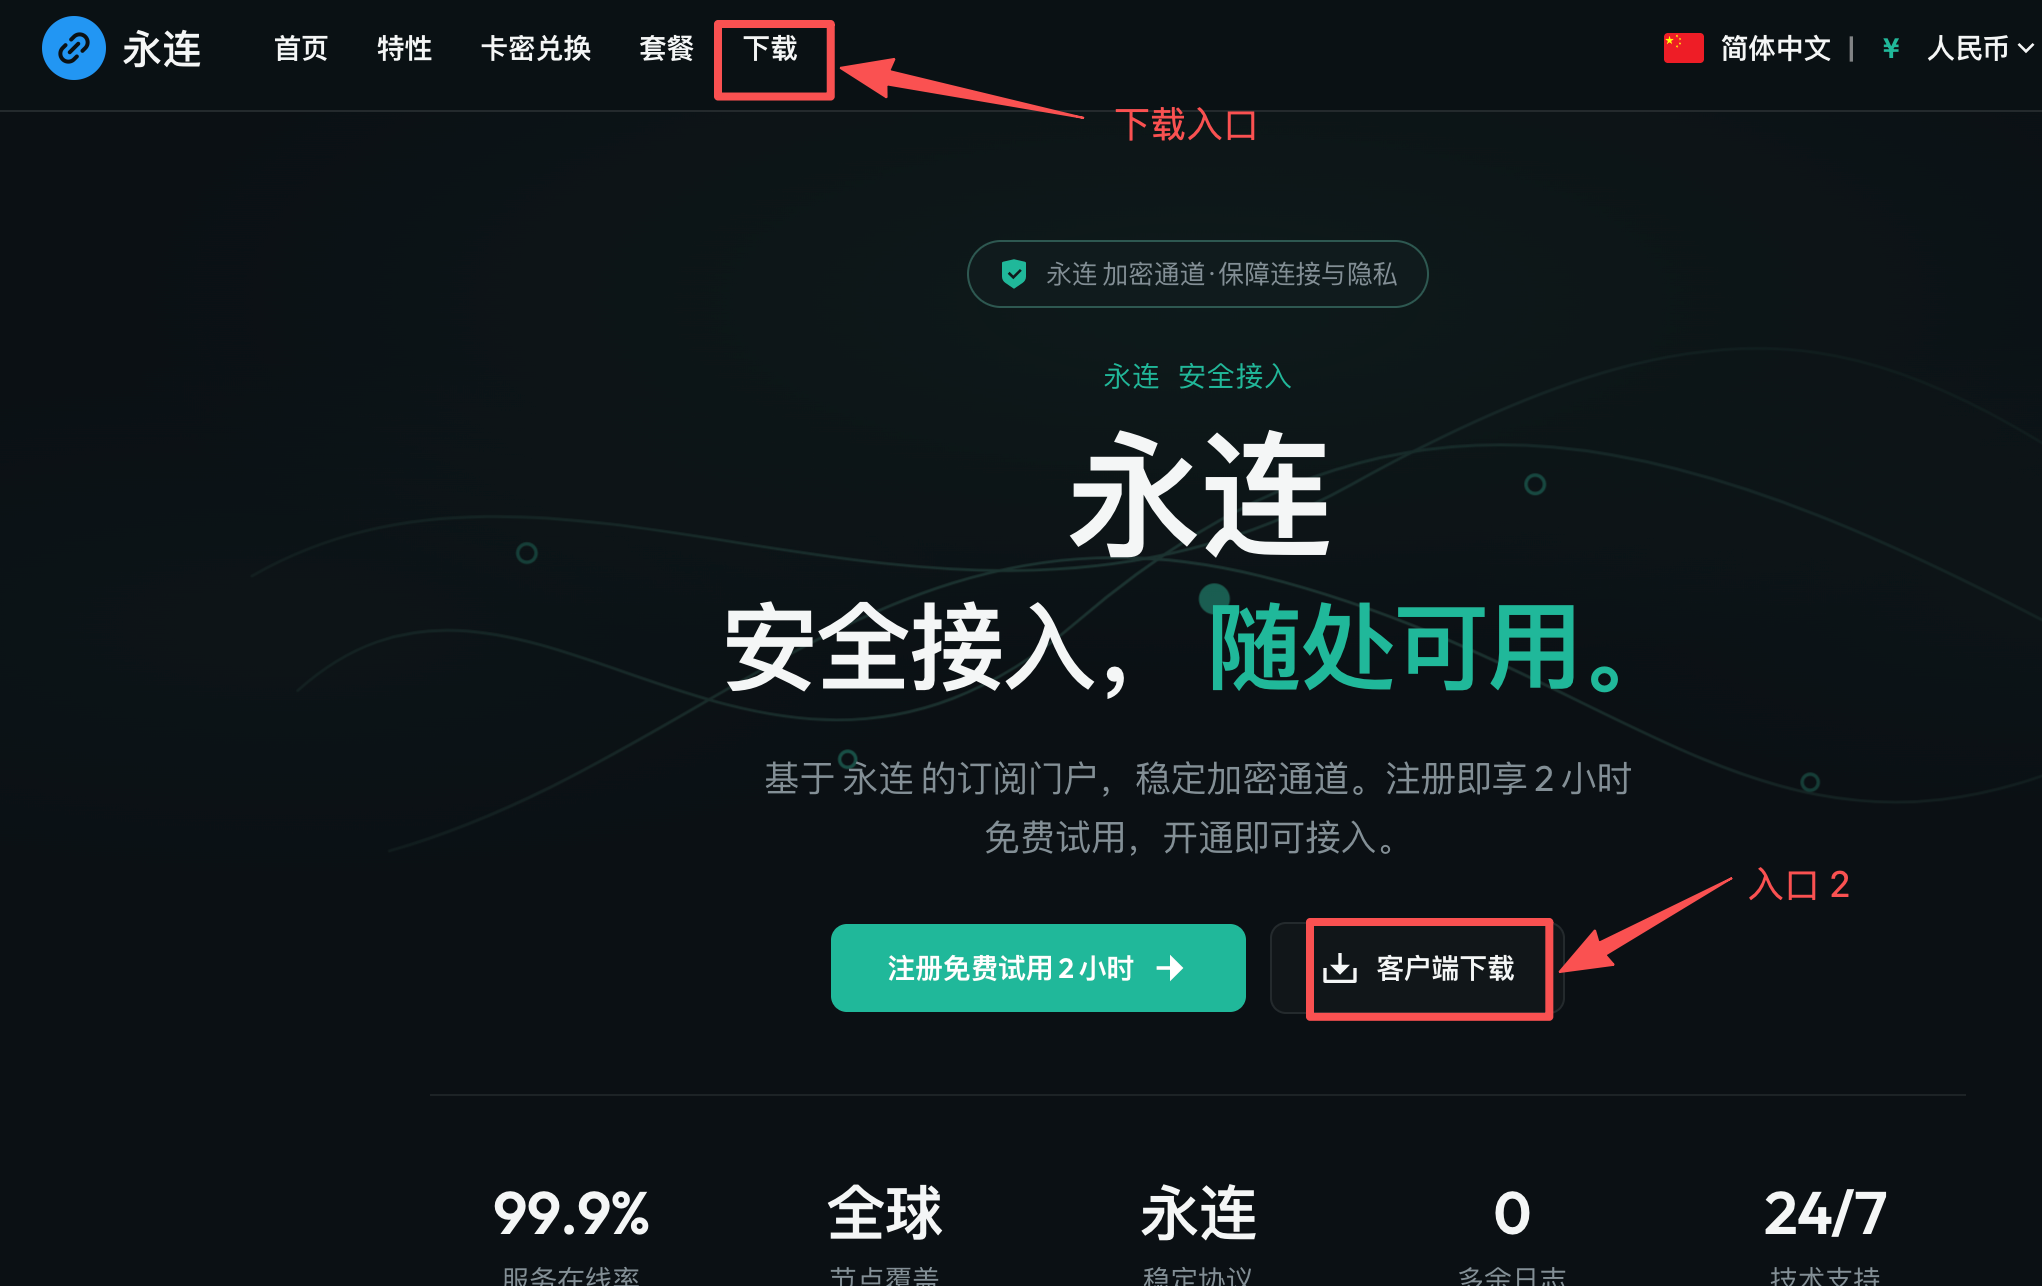
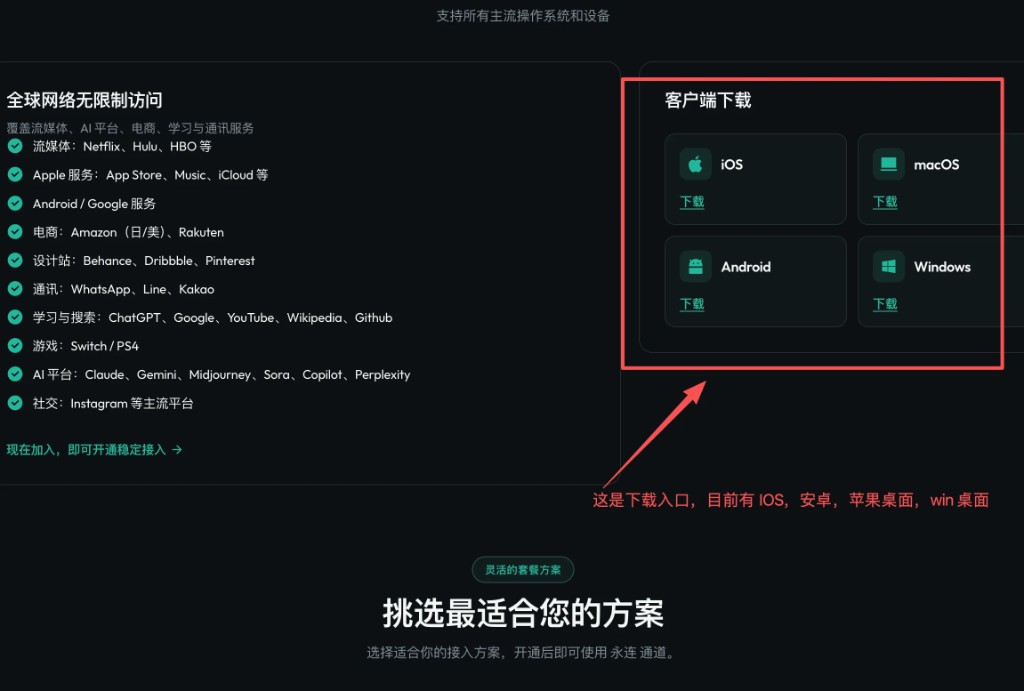
Install Cisco Secure Client. Use the client download section on the home page, or the platform links below.
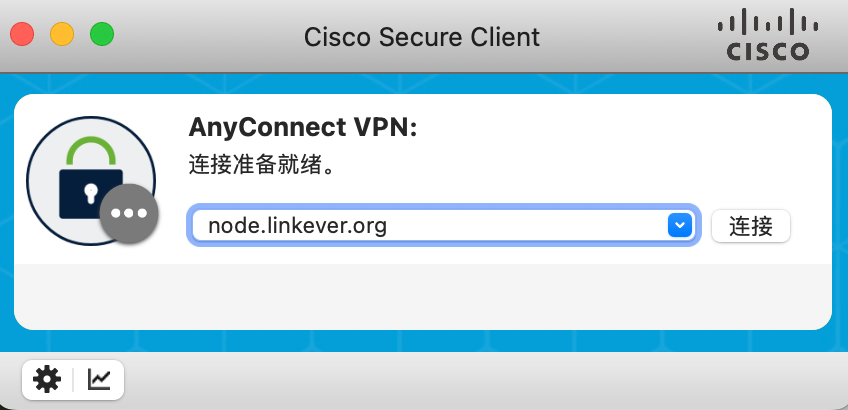
Enter node.linkever.org as the server—not a regional node hostname. After the first successful connection, the client receives the node list and you can switch regions from the dropdown.
Example: Apple devices
- Install and open Cisco Secure Client.
- Add a VPN connection and set the server to node.linkever.org.
- Enter your website username and password.
- Tap Connect. The status should change to connected.
- To change region, disconnect, pick a node from the dropdown, then connect again.
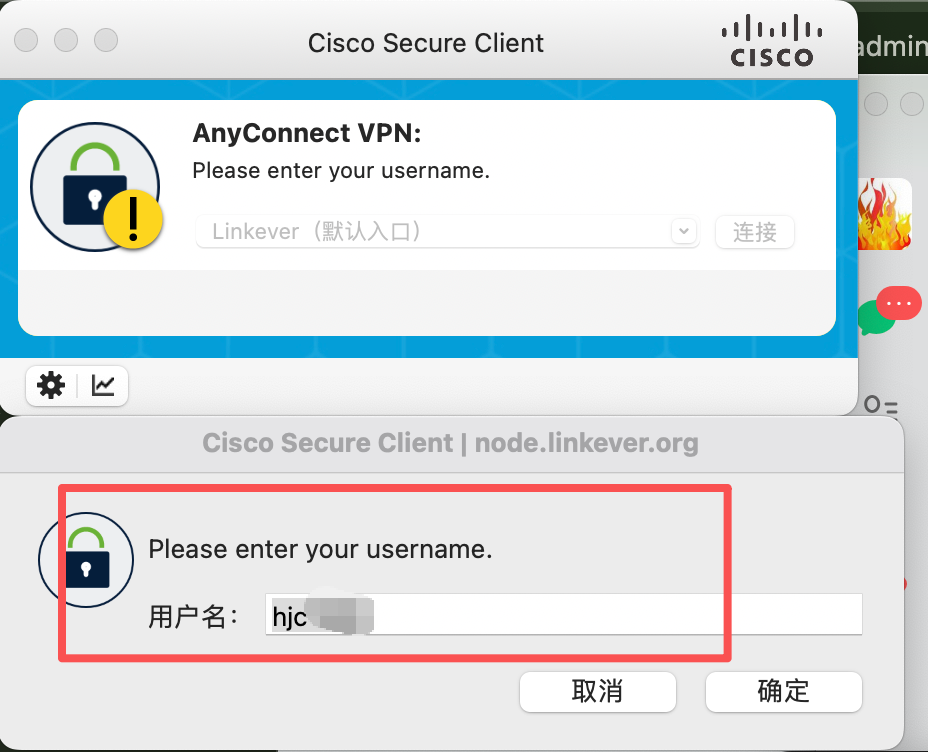
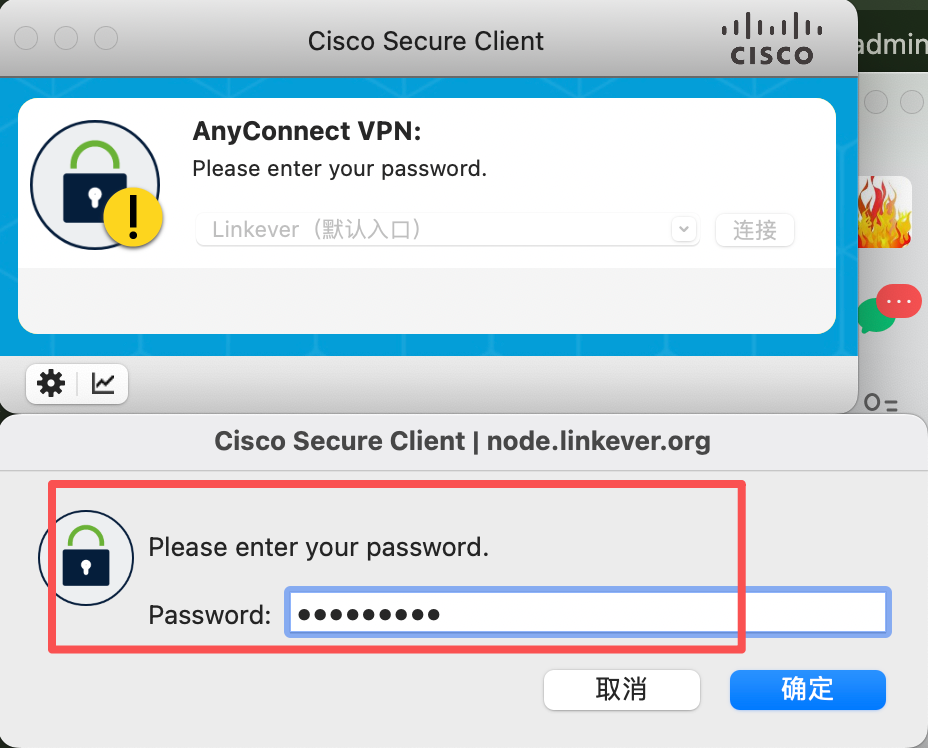
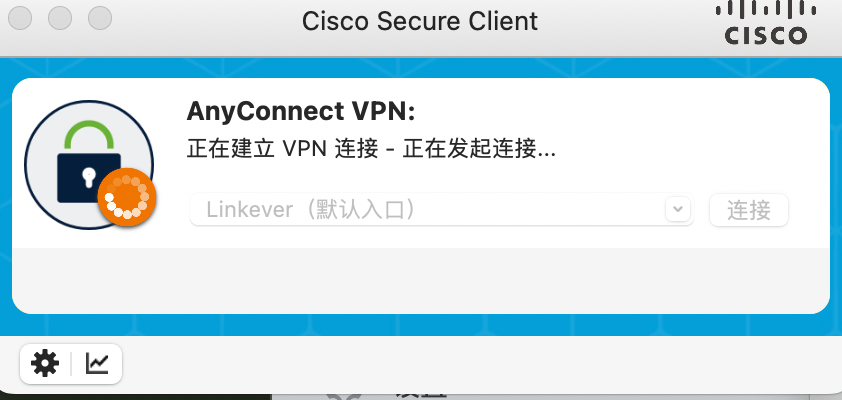
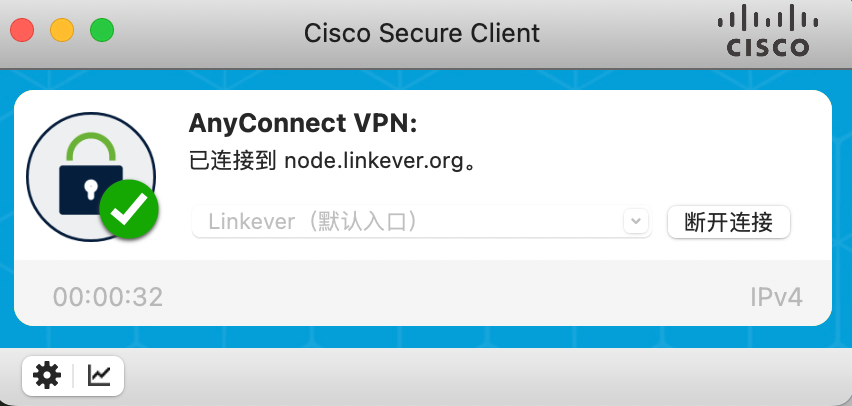
If you later change the website password under Account → Security, the VPN password follows. Sign in again in the client with the new password.
6. Card keys and crypto payment
Paid plans currently support card-key redemption and cryptocurrency payment. The trial is short, so connect the VPN first, then complete payment (crypto checkout pages usually need access to the open internet).
Redeem a card key
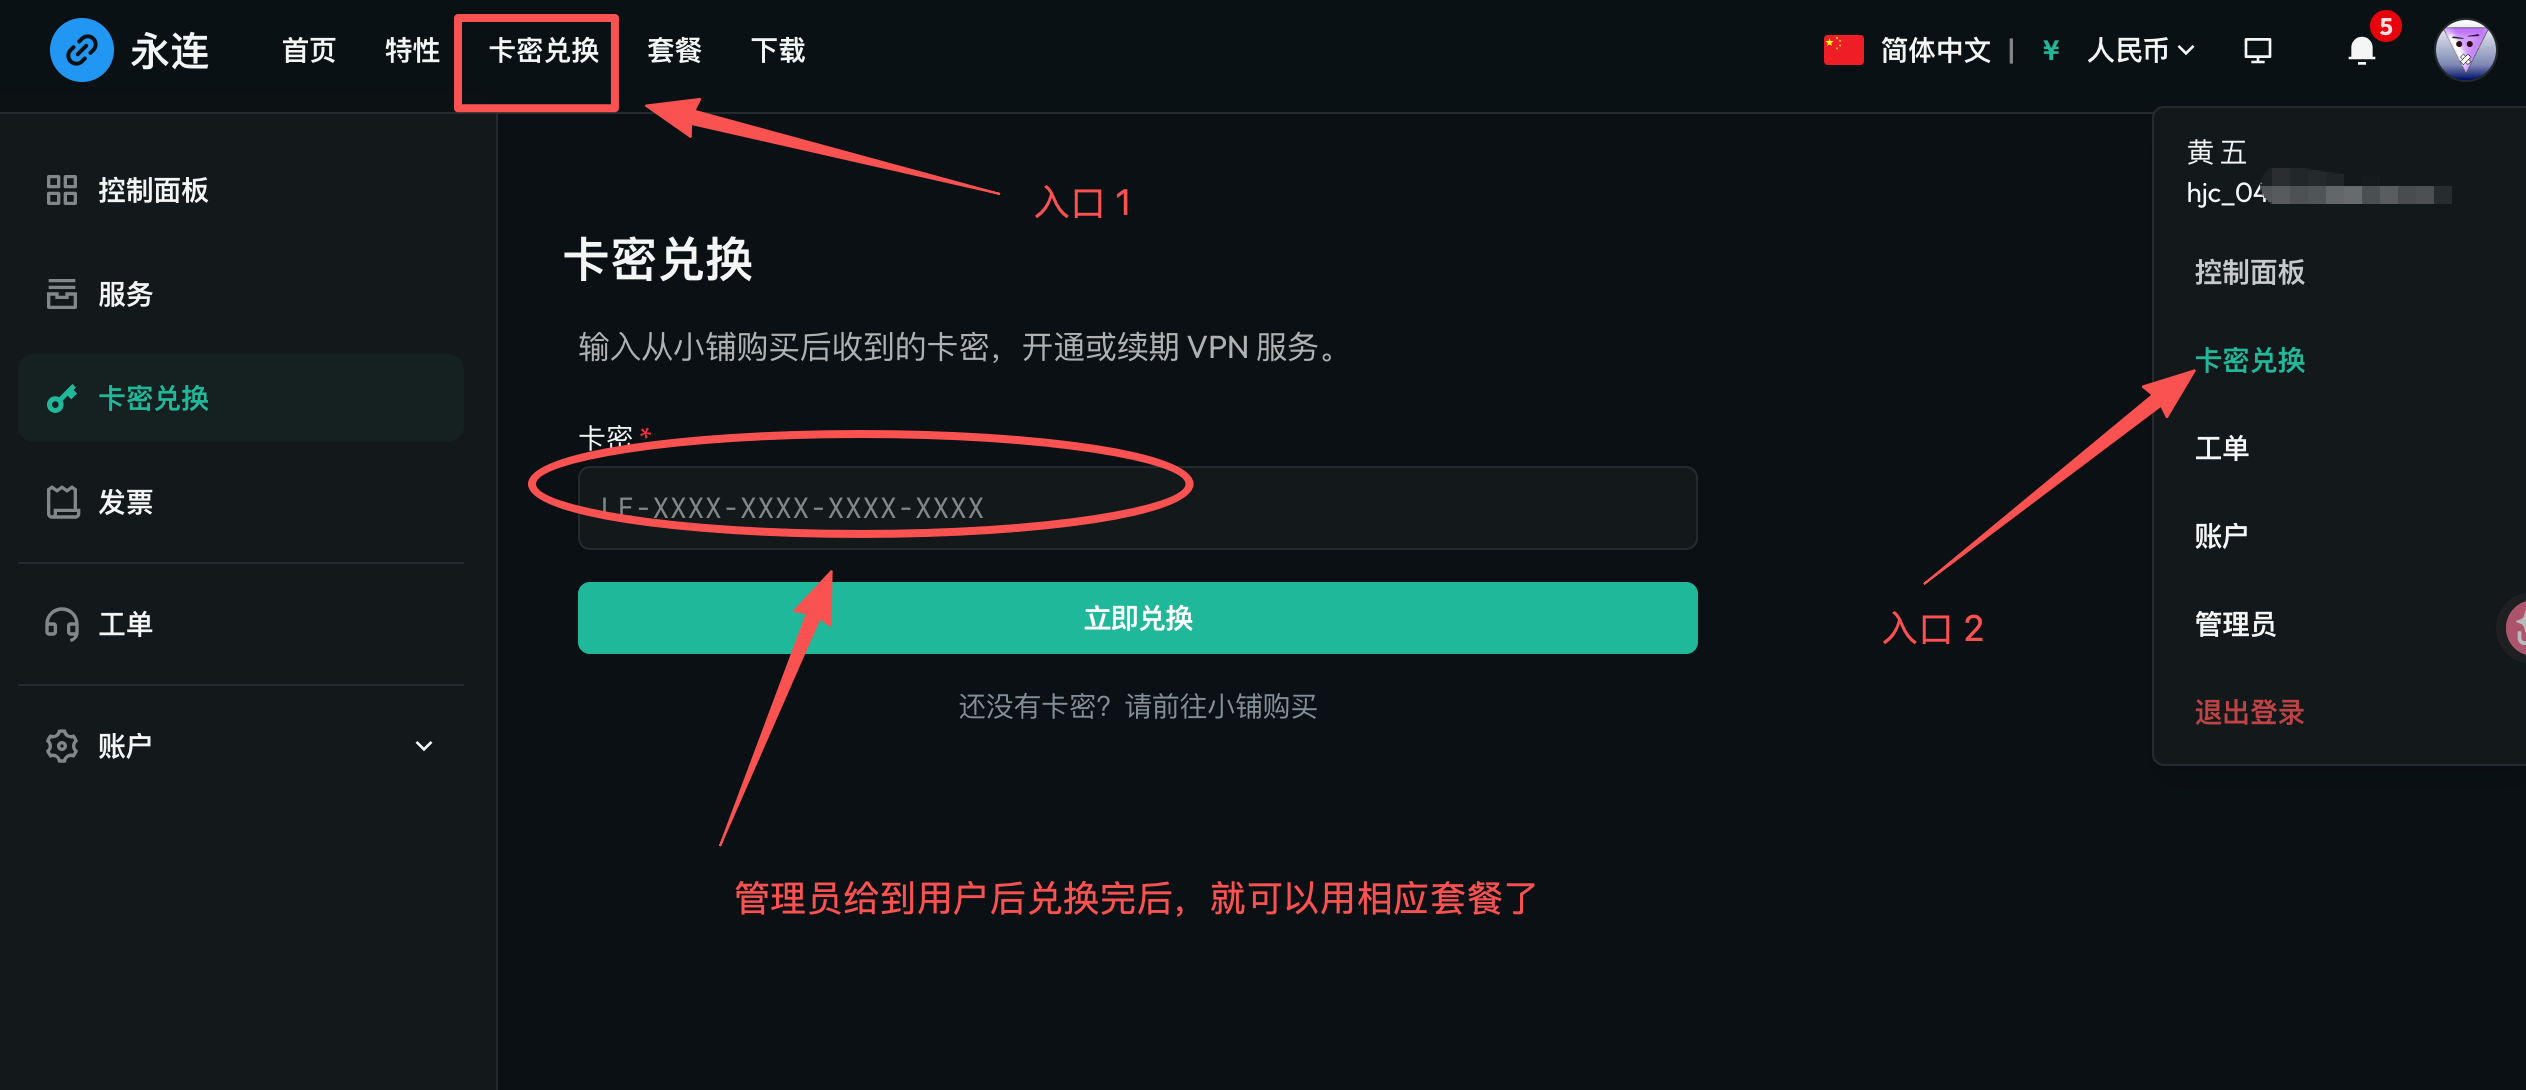
After buying a key from the shop, open Redeem card key, enter the code, and the service is created or extended. Then check the expiry date on the service page.
Cryptocurrency payment
You can also order a paid plan such as Personal from the home page. Connect with the trial first, then open the payment page to finish checkout.
7. Need help
If connection, card-key redemption, or payment fails, open a ticket or email support.
Support email: [email protected]